
Winter in Poland, with the exception of our beautiful mountains, is a real tragedy. The sun shines once a week, and the landscape resembles something out of the TV series “1670” – mud and bare branches. On top of that, it gets dark after 4 PM – a dream scenario for any photographer, right?
When the first October chills arrive, I start counting down the days to autumn-winter trips south, because I know these will be my only chances for outdoor shoots. But you still have to function somehow during those long months and do sessions to stay in shape. On the one hand, you can lock yourself in the studio, but on the other – renting apartments is a good idea – it’s always something different than another studio. However, many photographers have a problem with this type of photography – they take one flash with an umbrella and shoot with white light, forgetting about three-dimensionality or building atmosphere with light. It ends up with photos on the couch at 1/200s, f/4 ISO 100, flooded with white light – it’s absolutely nothing interesting.

I think apartment sessions are a really interesting challenge and a good idea to break the studio theme, but you have to approach the topic wisely – with preparation and an idea.
At the beginning of February, GlareOne released a series of mobile lamps, so I decided to test them in typical session conditions in the middle of winter. I took the whole set to a small house, where I stepped into the shoes of a typical photographer in Poland and faced the topic of this type of session! But let’s start from the beginning.
GlareOne – a new line of battery flashes
I have been cooperating with GlareOne since its inception. When Marcin Woźniak took over, the company started producing really interesting products – like the Vega 400 or Antares 600 lamps, which in my opinion are some of the most interesting studio propositions at such low prices. The Pro series softboxes are also great, but until now the company didn’t have any flash units in its offer that we could take outdoors, and in my opinion, building a flash system is best done based on one company, so that everything is compatible with each other.
In the first days of February, just after my session, GlareOne officially presented a whole line of new products – including 3 speedlights, one mobile 200 Ws unit and two new transmitters, as well as a set of accessories for the new products.

What all the new flash units have in common is full TTL and HSS support, meaning the flash units handle automatic flash metering and easily synchronize with shutter speeds up to 1/8000 sec. Each flash unit is powered by a dedicated battery pack, not AA batteries, which in turn translates to a greater number of flashes and faster charging. Interestingly, both the speedlights and the new triggers feature an innovative hot shoe that includes pins supporting Canon, Nikon, OM-System, Fujifilm and Lumix systems, while maintaining full compatibility – simply select the system you want the device to work with from the menu – great! Only Sony, due to a different hot shoe design, has its own separate version. So let’s take a look at the specific products.

Apus
This series opens the line of new products. It is represented by two lamps – models 48 and 80, and these numbers refer to watt-seconds. Both lamps are equipped with classic rectangular flash tubes and offer full wireless connectivity – they can serve as classic reporter lamps on the camera hot shoe, but can also be triggers or work as remotely triggered lamps. The choice is yours! Apus 48 offers a monochrome touch screen, while Apus 80 offers classic button control on the housing. The 80 model also has a modeling light in the lower part of the housing. Most importantly, the interfaces of each new device are really clear and easy to use.


Botis
This is a series of two completely different lamps. We will find in it models 80 and 200, which also indicate the power of the individual lamps. Model 80 is a reporter lamp, but unlike the Apus line, it is equipped with a round head that distributes the light more evenly, and on the back of the housing there is a large touch screen. Initially, I was skeptical about it, but after the first photos, there is absolutely nothing to worry about. The whole thing is very clear and responsive. The very intuitive selection of the lamp’s functions, which we make after pressing the Home button, also deserves a plus. The lamp is also equipped with a modeling light right next to the flash tube. A really solid reporter lamp!

The Botis 200 model is a completely different lamp – it cannot be mounted on the camera’s hot shoe and is intended for use on a tripod with various modifiers. It is equipped with a small dish with a grid and a magnetic mount for gel filters. If you want to mount larger modifiers, you should reach for the B-Grip (it is included with the lamp), which is an adapter for mounting accessories with a Bowens mount, such as dishes, softboxes or optical snoots. Moreover, using the same handle, we will adapt accessories to other mobile lamps.


The lamp itself is really lightweight, weighing just over a kilogram, which is a really good result for a 200 Ws power output. The battery is enough for 450 full-power flashes, and the lamp charges to full power in just 1.3 seconds – these are really great results. Importantly, the Botis 200 is equipped with a classic, round, bare-bulb flash tube, so it can easily fill larger modifiers, and the modeling light is very useful, especially when working in darker rooms or using an optical snoot.
Lynx i Polaris
New triggers have also appeared in the offer – I was very happy about this, because while the previous Flash RC is ok, working with multiple groups was not very comfortable. The new solutions offer cooperation with TTL and HSS systems. Lynx is simpler and cheaper, but thanks to many buttons on the housing – really convenient to use. In addition, it transfers the hot shoe to the top of the device, and can also serve as a receiver to trigger lamps from other manufacturers (without transferring automation).


Polaris, in my opinion, is one of the most interesting products. Its unique feature is the tilting housing – depending on how we work, the trigger can be positioned vertically, at a 45-degree angle or flat – parallel to the lens. Thanks to this, it will always be convenient to operate. The whole thing is very clear and easy to use. With the group button, we change its flash mode, while the 4-way controller is used to change the power, handle sound signals and the modeling light. Now that you’ve got to know the new products, let’s move on to our session!


The idea – that’s where it all starts
I mentioned at the beginning that we don’t have it easy here in terms of photography, especially in winter. When I got a call from Marek, GlareOne’s Marketing Manager, who told me about the new products and offered to collaborate, I knew I had to come up with a shoot that would put the new products to the test.
A studio shoot, yes, it would be successful without the slightest problem, but on the other hand, Antares and Vega would work better there. An outdoor shoot? Gladly, but not in February with 2 degrees Celsius on the thermometer. Another interesting location, such as an architectural showroom or a hair salon, where I have already produced materials with GlareOne? That’s also a great idea, but I have the impression that I’ve already photographed most of these places in Wrocław, and besides, access to such places is not as obvious as simply renting a house or apartment on Booking or Airbnb.
Hence my idea to step into the shoes of photographers who do numerous apartment sessions – on the Internet I see a lot of ads from photographers and models who are looking for people to collaborate with on such sessions. On the other hand, I later see many results of such sessions and most of them leave a lot to be desired – they lack ideas or attention to detail. Such interiors are not easy either, because they are often quite cramped, sometimes there are tacky accessories, and photographing against the background of radiators or a TV is not the best idea either. If we add to this an uninteresting styling and light from a speedlight with an umbrella, it is rather a recipe for failure than success.

When I was looking for a place for our session, I came across a small house on Lake Nysa. Due to the fact that when preparing the material, I always need a little more space and equipment, the choice fell on a house with an area of 55 square meters, of which I treated one room as an equipment warehouse – this is a good idea, because on the set we actually have only what is needed.
What I cared about was a rather minimalist decor. I really think we hit the spot, although when three lamps appeared in this small room, plus a model and a gimbal operator, it became quite cramped. But that’s good, because thanks to the more difficult task, I had to show more creativity. The most interesting element of the whole house was the wall above the sofa – tiled, it was located in the highest part of the house, so its over 5 meters of height added air to wider shots.

Of course, I had previously figured out what I wanted to do – I always try to get the most out of such sessions, so regardless of what kind of session I’m doing, I always aim for a minimum of 3 stylings and 3 lighting setups. It was no different in this case. I always put together a mood board before the sessions, which sets the direction of the session and gives information about what’s going on in my head to the whole team. It is also more convenient for me to arrange everything based on the image than on the text itself.
I invited Ola Kiecko to cooperate, with whom I have been working for a long time on various projects and I can safely say that this is one of the best collaborations – Ola is always involved, punctual and simply does a great job! Then, with the help of my wife Amelia, we arranged the stylings – they were supposed to match the atmosphere of the light and in my opinion we actually did a good job! But that’s not all, because the key here was one more element, although each of them always has to play on the set. I can’t imagine working on this session with an inexperienced model who would pose here in one polka dot dress.

The last element is, of course, the light. It was supposed to build the atmosphere here and play the first fiddle. Having a photogenic, though not easy place, a good model and diverse, matching stylings, I could ruin it spectacularly, for example by shining a lamp at the ceiling, just to make it bright, or by taking all the photos with top-side light.
Long before the session, I had already planned what I wanted to do – as much as possible, of course, because without ever being in a given place, I am not able to plan the light from A to Z. Indeed, this turned out to be the case with the last set – I made a strong correction to what I originally had in mind. So let’s move on to the specific settings – I hope they will be an inspiration for you and you will think about them when planning your next session in an apartment or house.
Sunset – my favorite!
Since I started working with Piotr Kuc from Stajnia Studio, I’ve loved shining from behind the windows. His studio is located on the ground floor, and there is practically no natural light in one part, so during many sessions I take the lamp outside and simply create sunsets around the clock. I knew this would be one of the lighting setups I would want to implement during our session. This, of course, requires either a ground floor apartment, or a house, or a large terrace – it is worth paying attention to this when choosing a place. An optical snoot can be a good substitute, but in my experience, in tight interiors, even with a wide 40-degree lens, the projected image will likely be too small.


Of course, the question of the necessary flash power to take such photos always arises here, and I always answer “it depends”. You have to measure your strength against your intentions, because if I wanted to break through with flash from long distances on a sunny day, I would probably need a 2400 Ws generator or stronger. In addition, many people do not pay attention to two more aspects – the modifier and the distance. I will not go into details here, but for example a good reflector can add 2EV of power, and a softbox will take away about 2EV. Of course, the character of the light will be extremely different, but I’m just talking about visualization and a point of reference.

When simulating sunset while taking pictures, you have to remember that the further away the lamp is, the better, because the difference in the amount of light by the window and in the depth of the room will be negligible – here the inverse square law comes to mind.
So what did I take with me to achieve this effect? A tripod is very important – the taller, the better. But taller is also heavier and more difficult to transport. Taking, for example, GlareOne Heavy Glide, probably half of the other things would not fit in my trunk. However, GlareOne has in its offer the Stork 395 model, so it’s a really tall tripod, which when folded is only slightly larger than the 295 model. Of course, it is far from the stability of the aforementioned Heavy Glide, but the lighter the set we mount, the more it will forgive us. Of course, you must remember to weigh down such a tripod – it is an absolute must!
The lamp was Botis 200, and for this, using the B-Grip, I mounted a Longbow long throw reflector, which strongly focuses the light to an angle of 45 degrees, so even though the lamp stood a good 15-20 meters from the house, I did not illuminate half of the resort, only quite precisely shone into the house itself.
And where does the golden character of the light come from? Here, of course, color correction filters come to the rescue – this time I used 1/4 CTO, I warmed up the light a bit, which gave me the effect of the setting sun, additionally combining it with a rather warm white balance setting in the camera.


And what about the power and exposure parameters? Well, the rule works perfectly here – the darker it is outside, the less power we need. I started taking pictures at the beginning of the blue hour, so it was by no means bright. My exposure parameters were 1/100s, f/2, ISO400, which meant that I was recording some ambient light and the sky took on a really nice, deep color. Then I turned on the flash and set it to just 1/4 power, which is about 50 Ws, which means that even smaller speedlights would have worked in these conditions! The key here is the proportions of ambient light to flash and the focusing modifier.
In fact, we didn’t have much room for maneuver here, because the room where we were taking pictures was small, but I photographed both against the light and with it, also using the window frames to create shadows on Ola. A few minutes of shooting and you’re done!


Sharp flash – some like it, some absolutely don’t
A flash directed straight at the model is the atmosphere of photos from small compact cameras from years ago. For many years treated as something tacky, but it is slowly coming back into favor. It’s like with fashion – when we were teenagers, we all wore Puma Speedcat shoes, which quickly became totally cheesy, and today they are back again. The fashion for sharp flash is returning in many areas of photography – from fashion to weddings and it’s simply worth knowing this method. Here, however, a certain catch awaits us – the length of the shadow.


When taking pictures horizontally, when the flash is mounted on the hot shoe, everything is ok, because the shadow nicely hides behind the model, but when taking pictures vertically, the shadow unfortunately falls next to the photographed person and in my opinion it doesn’t look bad, but it can look better. When I take such pictures, I simply detach the flash from the sled, put on a radio trigger and hold the camera in one hand and the flash in the other – just above the lens. Yes, it is not the most convenient, especially if the camera weighs almost 2.5 kg, but such sessions do not last long hours either.


In this setup, we took some photos both on the tiled wall and against the background of the kitchen. This type of photography likes a bit of mess, less obvious framing, more wide angle. As for the parameters – here I totally extinguished the ambient light using 1/200s, f/4, ISO100. I set the Botis 80 lamp to TTL mode – this is the best idea for such photos, because we usually act quite dynamically – sometimes we are closer, sometimes further from the model, so this system works wonders here, choosing the right flash power for each frame. The only thing is it’s a pity that after the flash, the used power is not shown on the lamp. Such photos are best taken with lamps with a round head in the widest zoom position – they distribute the light most beautifully, give an even gradient of natural vignetting and you can’t see the Fresnel lens pattern. Here Botis 80 did a great job!


Building the mood with 3 lamps
Here again I will return to the beginning of my article – many photographers take one lamp, sit the model on the sofa or at the table and rely 100% on such light, totally destroying the character of the place. Beginning photographers often treat such rooms like a studio, not thinking about several plans or what the background looks like. My last photos are intended to show that by using this one wall again, it can look completely different than in the previous sets. Ola put on an elegant, shimmering dress and pinned up her hair – I wanted the whole thing to take on a bit of elegance. I also knew I would start with portraits.
My original idea was to use 3 lamps with warm filters, including a warm backlight – I put a PRO Reflector with a grid and a 1/2 CTO filter on the Apus 80. It turned out not bad, but the whole interior disappeared too much in the shadow for me. So how did I finally build the whole lighting?


Let’s start with the fact that evenings at home are associated with warm, pleasant light rather than snow-white white. Besides, in my house in the evening, all the lamps by which we spend time have between 1500 and 2000 Kelvin. My main light was the Botis 80 lamp placed in the B-Grip with a 1/4 CTO filter. I put the Octa Pro 120 cm softbox on it and added a grid to it – thanks to this I got a soft, warm and directional light.


The second lamp was the Botis 200, also with B-Grip and Spotlight PRO 40° with CTO filter and blinds-shaped gobo. It would be best if the lens in the snoot was even wider, or if I had room to move the snoot away, but as I mentioned – I was working in a really small room. This lamp gave me a pattern behind Ola on the wall, adding three-dimensionality. The third lamp was the Apus 80 in another B-Grip with two CTB filters. This lamp was aimed at the wall and ceiling, giving a cool fill light, which in my opinion filled the interior well, adding a night character.


Then, of course, I put it all together and took a series of portraits, but it would be a shame for me to use this setting only for close-ups. After the portraits, I asked Ola to get on the table, which added a bit of monumentality to her, and besides, thanks to this, I couldn’t see the sofa in the frame and additionally I could better show the height of the room. With wider shots, unfortunately, the pattern from the snoot became even smaller, but well – I had no influence on that anymore. Of course, when Ola stood on the table, I raised each lamp so as to maintain the same character of light as in the portraits.


A few words at the end
As you can see, having a really small, seemingly not the most interesting room for photos, in a few hours we can build several completely different photo atmospheres. You just have to remember that each of the elements is responsible for the success of the session, which is why prior preparation is so important. If I had rented such a house, taken one lamp and an umbrella, the model would be an inexperienced girl who would take with her a bag of crumpled clothes, the photos would probably end up in the trash.
As for the equipment – it worked really well! I am rooting for GlareOne because they offer really interesting products at very good prices. It’s great that now studio lamps have been supplemented with battery-powered ones, because thanks to this, photographers can think about building a flash ecosystem based on GlareOne products. The advantage of the new lamps is precisely the battery power, TTL and HSS modes, universal hot shoe and great mobility. In turn, using B-Grips, we will mount most popular Bowens accessories, so in sessions like this, I used their potential without any problems.

")
Another plus is the very comfortable Polaris trigger, thanks to which controlling multiple lamps is a piece of cake, and its tilting design makes it suitable for many types of photography.
Finally, it is worth mentioning the prices, which are really well calculated, because the lamps are priced between 700 and 1700 zł, and the accessories, especially from the Pro series, are really great in terms of quality. I believe that GlareOne has products for people who value good quality, but their budgets do not allow them to buy Elinchrom or Profoto solutions. These are simply very good products at very good prices.
So when are you planning your own apartment session?
Jakub Kaźmierczyk – profile

I’m Kuba Kaźmierczyk and I’ve been a professional photographer for over 10 years. It’s something that accompanies me every day during my sessions, but also in my free time. I try to be a versatile photographer, so my portfolio includes photos from many different areas of photography. Commercially, I work mainly with companies creating photos for advertising campaigns, I have worked for companies such as Renault, Dacia, Lexus, Grycan, Pizza Hut, KFC, Burger King, Eurobank, Shopee, Acer, Olympus and many others. I photograph interiors, products, people and food. After hours, I fulfill myself in portrait and fashion photography – this gives me the most pleasure and satisfaction, especially creating thoughtful sessions with interesting stylizations. I am increasingly reaching for analog cameras, thanks to which I feel a return to my roots. I like to set myself challenges and try new things – underwater or drone photography. During my numerous trips, I observe the bustling life of the city, I photograph landscapes, food or the local community.
My second area is photography education, both live and online. I actively run social media, record videos for my YouTube channel, and I am also involved in preparing training materials for the eduweb.pl platform. For some time now, I have been developing the photographic path of the ahoy.so platform, a community of photographers, for which I create numerous photography tutorials. I also conduct live broadcasts during which I do sessions, edit photos, or give business advice.
I also cooperate with many companies from the photography industry, leaders in their fields. Mutual support and appreciation of my work is extremely important to me, and thanks to it I am able to prepare materials from photo shoots and show the use of equipment in practice. I work, of course, with Peak Design, as well as brands such as GlareOne, Canon, OM-System, Eizo, Wacom, Manfrotto, Acer, Nvidia, WD, Sandisk.
Read more articles
 https://glareone.eu/wp-content/uploads/2025/12/030_KA519858_Olga_Social.jpg
1366
2048
Kamila Przyjemska
http://glareone.eu/wp-content/uploads/2024/04/logo-glareone.png
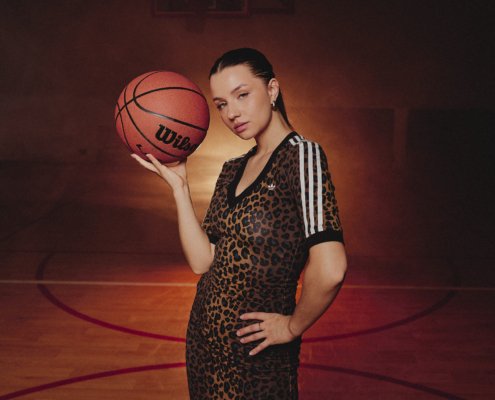
Kamila Przyjemska2025-12-22 10:52:262025-12-22 13:40:35GlareOne Flash Lights in a Sports Photo Shoot – Have the Botis 400 and Botis 600 Changed the Game?
https://glareone.eu/wp-content/uploads/2025/12/030_KA519858_Olga_Social.jpg
1366
2048
Kamila Przyjemska
http://glareone.eu/wp-content/uploads/2024/04/logo-glareone.png
Kamila Przyjemska2025-12-22 10:52:262025-12-22 13:40:35GlareOne Flash Lights in a Sports Photo Shoot – Have the Botis 400 and Botis 600 Changed the Game?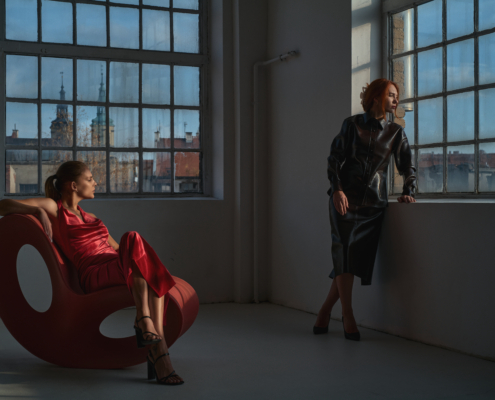 https://glareone.eu/wp-content/uploads/2025/12/Glare-One-12-1-scaled.jpg
1708
2560
Kamila Przyjemska
http://glareone.eu/wp-content/uploads/2024/04/logo-glareone.png
Kamila Przyjemska2025-12-19 13:52:462025-12-19 14:39:25Conscious lighting in photography – combining flash power with LED subtlety
https://glareone.eu/wp-content/uploads/2025/12/Glare-One-12-1-scaled.jpg
1708
2560
Kamila Przyjemska
http://glareone.eu/wp-content/uploads/2024/04/logo-glareone.png
Kamila Przyjemska2025-12-19 13:52:462025-12-19 14:39:25Conscious lighting in photography – combining flash power with LED subtlety https://glareone.eu/wp-content/uploads/2025/12/dz0zMDAwJmg9MjIwNA_src_240555-Clipboard2-scaled.jpg
1881
2560
Kamila Przyjemska
http://glareone.eu/wp-content/uploads/2024/04/logo-glareone.png
Kamila Przyjemska2025-12-17 12:04:232025-12-17 13:22:48New player in the flash market – GlareOne Botis 80 and Botis 200
https://glareone.eu/wp-content/uploads/2025/12/dz0zMDAwJmg9MjIwNA_src_240555-Clipboard2-scaled.jpg
1881
2560
Kamila Przyjemska
http://glareone.eu/wp-content/uploads/2024/04/logo-glareone.png
Kamila Przyjemska2025-12-17 12:04:232025-12-17 13:22:48New player in the flash market – GlareOne Botis 80 and Botis 200