
Sixteen years ago, I began my photographic journey by holding on to flash light as the only stable point in the unknown world of photography. Daylight intimidated me. I didn’t understand its direction, color temperature, or variability. It felt wild, unpredictable, and lacking the control I desperately needed as a beginner photographer.
With a camera in my hand and a huge ambition to create something exceptional, I was searching for certainty—and at that time, the only certainty was flash. In a small studio at Igor’s place in Kraków, where I was taking my first steps, flash was everything. It gave shape to my images. I set the light, fired the flash, checked the histogram. Sometimes the result was great, other times completely unsuccessful—but at least I felt I had some control over it.

Daylight? I avoided it like fire. It seemed banal, unstable, too “ordinary.” I believed that a true professional works only with flash, and everything else is a compromise. Today I know it was more an escape from the unknown, from risk, from light that cannot be fully controlled—especially at the beginning of a photographic journey.
My first commercial shoots were mainly business portraits and branding images, executed exclusively with flash. I focused on technique: distance, angle of light, synchronization, Lee color filters, and every time I set the lighting in exactly the same way. I felt like an image architect, building a scene from scratch. And although the results were getting better and better, something was missing—breath, life, that softness which natural light provides.
Over time, I felt more and more strongly that my images, although technically correct, were too predictable and repetitive. Until one evening, watching the setting sun streaming through a window, I realized what I had been missing. That patch of golden light on the wall, softly shaping the model’s face, was everything I had been looking for—and everything I had been ignoring until then.

That was the breakthrough. I realized I didn’t have to be afraid of daylight anymore—I could recreate it, simulate it, design it. Thanks to various flash modifiers and the flexibility of artificial light, I was able to achieve exactly the same light character that I had previously associated exclusively with natural sunlight.
That’s how my journey toward greater awareness began. I started learning not only how to use artificial lighting, but above all how to feel light. Working with artificial light opened up new possibilities for me. It was no longer just flash for effect—it became a conscious simulation of sunlight, with full control over its softness, direction, and color.
Flash gives me power and precision. LED light, on the other hand, offers subtlety and observation. Today I know that only the conscious use of both sources allows me to recreate, with precision and intention, the magical atmosphere of natural light—something that once seemed completely unattainable.
In summary, over the years I’ve learned that I don’t have to choose between nature and technology. I’ve discovered that I can create exactly the light I want by using the full range of available tools.
In my everyday work, I rely on the GlareOne system. It’s equipment that gives me everything: reliability, consistency, flexibility, and confidence—whether I’m creating a dramatic studio portrait or a soft, natural look in daylight conditions.
Light in practice – when to use flash, and when LED?

Before I show you specific examples of my work using different types of lighting, it’s worth pausing for a moment and answering some fundamental questions: when is it worth reaching for flash, when for LED light, and what actually differentiates them?
In a photographer’s daily work, the choice of light source cannot be random. It’s not just a technical decision—it’s a choice that influences the mood of the image, the way the story is told, and the relationship you build with the person on the other side of the lens. That’s why today I no longer ask myself “LED or flash?”, but rather: “What kind of light will best convey what I want to communicate to the viewer?”
Both GlareOne studio flash units and continuous LED lights have their own unique characteristics. Each works best in different situations, and each can be equally effective when used consciously. Sometimes I choose one of them, and sometimes I combine both.
When do I choose flash?

Flash light is, for me, synonymous with full control and power. I use it most often when:
-
I work in the studio and need predictability – every series of images looks the same, every exposure is identical,
-
I need to take control over lighting conditions on location and add artificial light to make my images stand out,
-
I want to create a bold, graphic portrait with strong subject separation, dramatic shadows, or precise rim light,
-
I need high flash power, for example in fashion, beauty, packshot photography, as well as advertising campaigns where I use larger light modifiers.
When working with GlareOne flash units, I particularly appreciate:
-
flash consistency and repeatability, which is crucial in catalog photography and commercial shoots,
-
full compatibility with light modifiers – from standard softboxes to precise reflectors and grids, thanks to the universal Bowens mount,
-
high light quality with neutral color and a 5500 K color temperature,
-
reliability,
-
an excellent price-to-performance ratio.
Disadvantages of flash?
Flash requires more preparation, synchronization, and imagination. You don’t see the light “live” – you have to predict the result before pressing the shutter. For beginners, this can be a barrier, but also a great adventure and, in the long run, a better way to understand and master light.
When do I choose LED lights?

Continuous light is, for me, an intuitive and natural tool that ensures a smooth workflow. I reach for it most often when:
-
I want to create a calm, comfortable atmosphere on set, especially when working with people who don’t feel confident in front of the camera. The absence of flash makes the session gentler, and the model or client feels more relaxed,
-
I conduct lifestyle or portrait sessions that are meant to look natural and “soft” – LED light allows me to build a mood almost identical to natural daylight,
-
I combine photography with video – during branding sessions or backstage shoots, when consistency of light across both formats is essential,
-
I want to work quickly – the light is on all the time, so I see the results in real time, which speeds up the entire creative process,
-
some GlareOne lights also offer adjustable color temperature in the 2700–6500 K range, so I don’t need to use Lee gel filters.
When working with GlareOne LED lighting, I value above all:
-
real-time visibility of the effect – I can observe how the light falls on the model’s face, the background, and the space, which provides great control while maintaining flexibility,
-
smooth adjustment of intensity and color temperature – allowing me to match existing light conditions or precisely build a desired mood (for example, getting closer to the golden hour look),
-
high CRI – very accurate color rendering, which is essential for beauty, product, and stylized photography,
-
mobility and silent operation – ideal for working at a client’s home, on film sets, or during hybrid photo/video sessions.
Disadvantages of LED light?
Of course – LEDs, despite their efficiency, still fall short of flash in terms of power. You won’t freeze fast motion with them, which can be a limitation for dynamic action or sports photography. It’s also harder to achieve very dramatic shadows without large modifiers or full control over the environment. But… these limitations teach attentiveness. They force you to observe and build light step by step, rather than taking shortcuts.
Light in action – practical examples from the set
Every session tells a different story. Sometimes I’m aiming for strong expression and graphic form, other times for subtle, light-driven narration. The key is that thanks to GlareOne equipment, I can consciously choose the solution best suited to the task.
Example 1 – flash in branding photography

Photo: Piotr Werner, Jurek – Studio Kolor, Kraków
During business sessions and branding portraits that I shoot in the studio, I most often work with flash. I use one main GlareOne Vega 400 flash, usually paired with a large 100 cm PRO octagonal softbox, and a second identical flash used as fill light with a 60×90 cm softbox. This setup gives me soft, flattering light—ideal for facial modeling and clean separation from the background. If I need to illuminate the background or add rim light, I simply add more flashes with appropriate modifiers.
Why flash? Because it gives me full control over every aspect of the image. Nothing comes as a surprise. Every image series looks consistent, which is crucial for business sessions shot in a professional studio environment.
The photo above was taken using a clamshell lighting setup, clearly visible in the image below. What really matters here is light power.

The top light used as the key light is stronger, while the bottom light acts as fill light, with its power adjusted relative to the main light—usually about half the power or slightly more.

Konstantyn – Studio Unique, Cracow

Konstantyn – Studio Unique, Cracow
The same lighting setup can, of course, also be used in commercial photography. The modifiers—especially the key light—are adjusted depending on the desired effect. In the photo below, I used a GlareOne Orb 150 White umbrella instead of a softbox to achieve even softer light, which also helped illuminate the background behind the model.
Example 2 – LED light in on-location branding photography
During business sessions and branding portraits shot at clients’ locations, I increasingly rely on continuous GlareOne lighting. The spaces I work in vary greatly—small offices, tight conference rooms, windowless interiors. In such conditions, continuous light works exceptionally well. It’s quiet and, most importantly, it stays on all the time, allowing me to react instantly to changes and precisely adapt the lighting to the environment. What’s also crucial is that in small spaces, light is much easier to control compared to flash.
For these sessions, I most often use four GlareOne lights: two LED 300 BiColor D units and two LED 160 BiColor D units, combined with a 100 cm PRO softbox, a 60×90 cm softbox, and two included reflectors. I set up the lighting exactly the same way as before: a key light and a fill light. This arrangement produces soft, natural illumination that beautifully shapes the face. Additionally, thanks to adjustable color temperature, I can easily balance ambient light with LED light without the need for gel filters. The two additional lights are used either to illuminate the background or as fill light bounced off the ceiling.
For on-location sessions, LED lights give me greater control over light than flash units. I see the effect in real time and can react immediately, which significantly shortens working time and reduces stress for the person being photographed.
Example 3 – flash on location

Photo: Piotr Werner, Model: Magda Frost, Sopot 2025
During one of the sessions held as part of the workshops at the ŚwiatłoSiła 2025 festival, we worked with model Magdalena on the beach just before sunset. The daylight was soft, warm, and very picturesque, but at the same time too flat to achieve a strong, three-dimensional effect.
That’s when I reached for the mobile GlareOne Botis 200 flash. It’s a compact yet very powerful outdoor flash, which I could easily mount on a stand and precisely aim at the model, with the help of Paulina, who assisted during the shoot.
Using flash allowed me to “cut” the ambient exposure—darkening the background while simultaneously lighting the subject. As a result, the image gained depth and drama; it was no longer just a record of a moment in beautiful light, but a fully realized, consciously created scene.

Assistant: Paulina Szmidtka
The Botis 200 gave me not only flash power, but also full control—I could shoot at short shutter speeds, synchronize the flash with the camera, and instantly fine-tune the settings. This shows that well-used flash in outdoor photography doesn’t take away from naturalness—quite the opposite. It adds character to the image and guides the viewer’s eye exactly where we want it.
TIP – What’s extremely important to me when using flash is blending daylight and flash in such a way that the viewer doesn’t even think artificial light was used to create the scene. In my outdoor photography, flash is only a subtle accent that makes the difference. I highly recommend watching behind-the-scenes footage from Annie Leibovitz’s photo shoots.
Example 4 – lighting combined with daylight

Photo: Piotr Werner, Models: Jana and Ania
During photography workshops in Legnica (Studio Kominka 22), we worked in a spacious but heavily sunlit room with large windows. Daylight was entering strongly from one side, creating high contrast and overexposed areas on the models’ faces. Instead of cutting or limiting the light, I decided to consciously balance it by filling the opposite side of the frame with continuous LED light.
I used two GlareOne LED 300 Bi-Color D lights equipped with standard reflectors. I placed them on opposite sides of the room and aimed the light toward the ceiling, so that the softly bounced light would fill the space and balance the shadows. Thanks to this technique, the light was neither direct nor harsh—it behaved like naturally reflected light, gently wrapping around the models. This allowed me to correctly set the camera exposure for daylight and capture the image properly.

Photo: Piotr Werner, Models: Jana and Ania
The ability to adjust the color temperature in the 2700–6500 K range allowed me to match the white balance to the daylight entering through the windows, which ultimately resulted in a very natural and consistent look. The entire scene appeared as if it were lit entirely by natural light, but with full control over how the light was shaped within the frame. This combination of artificial lighting and daylight proved to be an ideal solution—it not only evened out the exposure but also added lightness and a sense of space to the images. The models felt comfortable, the working atmosphere was relaxed, and it’s worth mentioning that there were over 20 people present.
Example 5 – creative lighting in the photo studio

Photo: Piotr Werner, Model: Julia Korzeniowska
During the launch of the new optical snoot by GlareOne, we decided to carry out a photo shoot and record video content (available on YouTube – GlareOneTV) at Studio Unique in Kraków. I opted for a fully LED-based lighting setup, which gave me not only flexibility but also complete control over the light in a challenging space, where precise positioning of the optical snoots was essential. I used five LED lights, arranged to create lighting with varying character and depth.
Two of the lights – GlareOne LED 300 Bi-Color D – were used as fill lights. I fitted them with 100 cm PRO softboxes. Their role was to gently illuminate the entire space and build a soft base that smoothed shadows and allowed for a clean, balanced exposure.
As the key light, I used three GlareOne lights of different power outputs, equipped with optical snoots with interchangeable optics. This allowed me to precisely direct the light onto the model’s face, emphasizing facial features, skin texture, the character of the styling, and selected areas of the cyclorama. The optical snoots provided concentrated, crisp light with a cinematic feel, which worked perfectly with the darker background and the raw atmosphere of the studio.

Photo: Piotr Werner, Model: Julia Korzeniowska
This setup allowed me to combine softness with contrast, control with naturalness, and to create an atmosphere that gave the model depth and a distinctive character. The GlareOne LED lights performed exceptionally well here—they worked quietly, consistently, and delivered exactly the image I had envisioned beforehand.
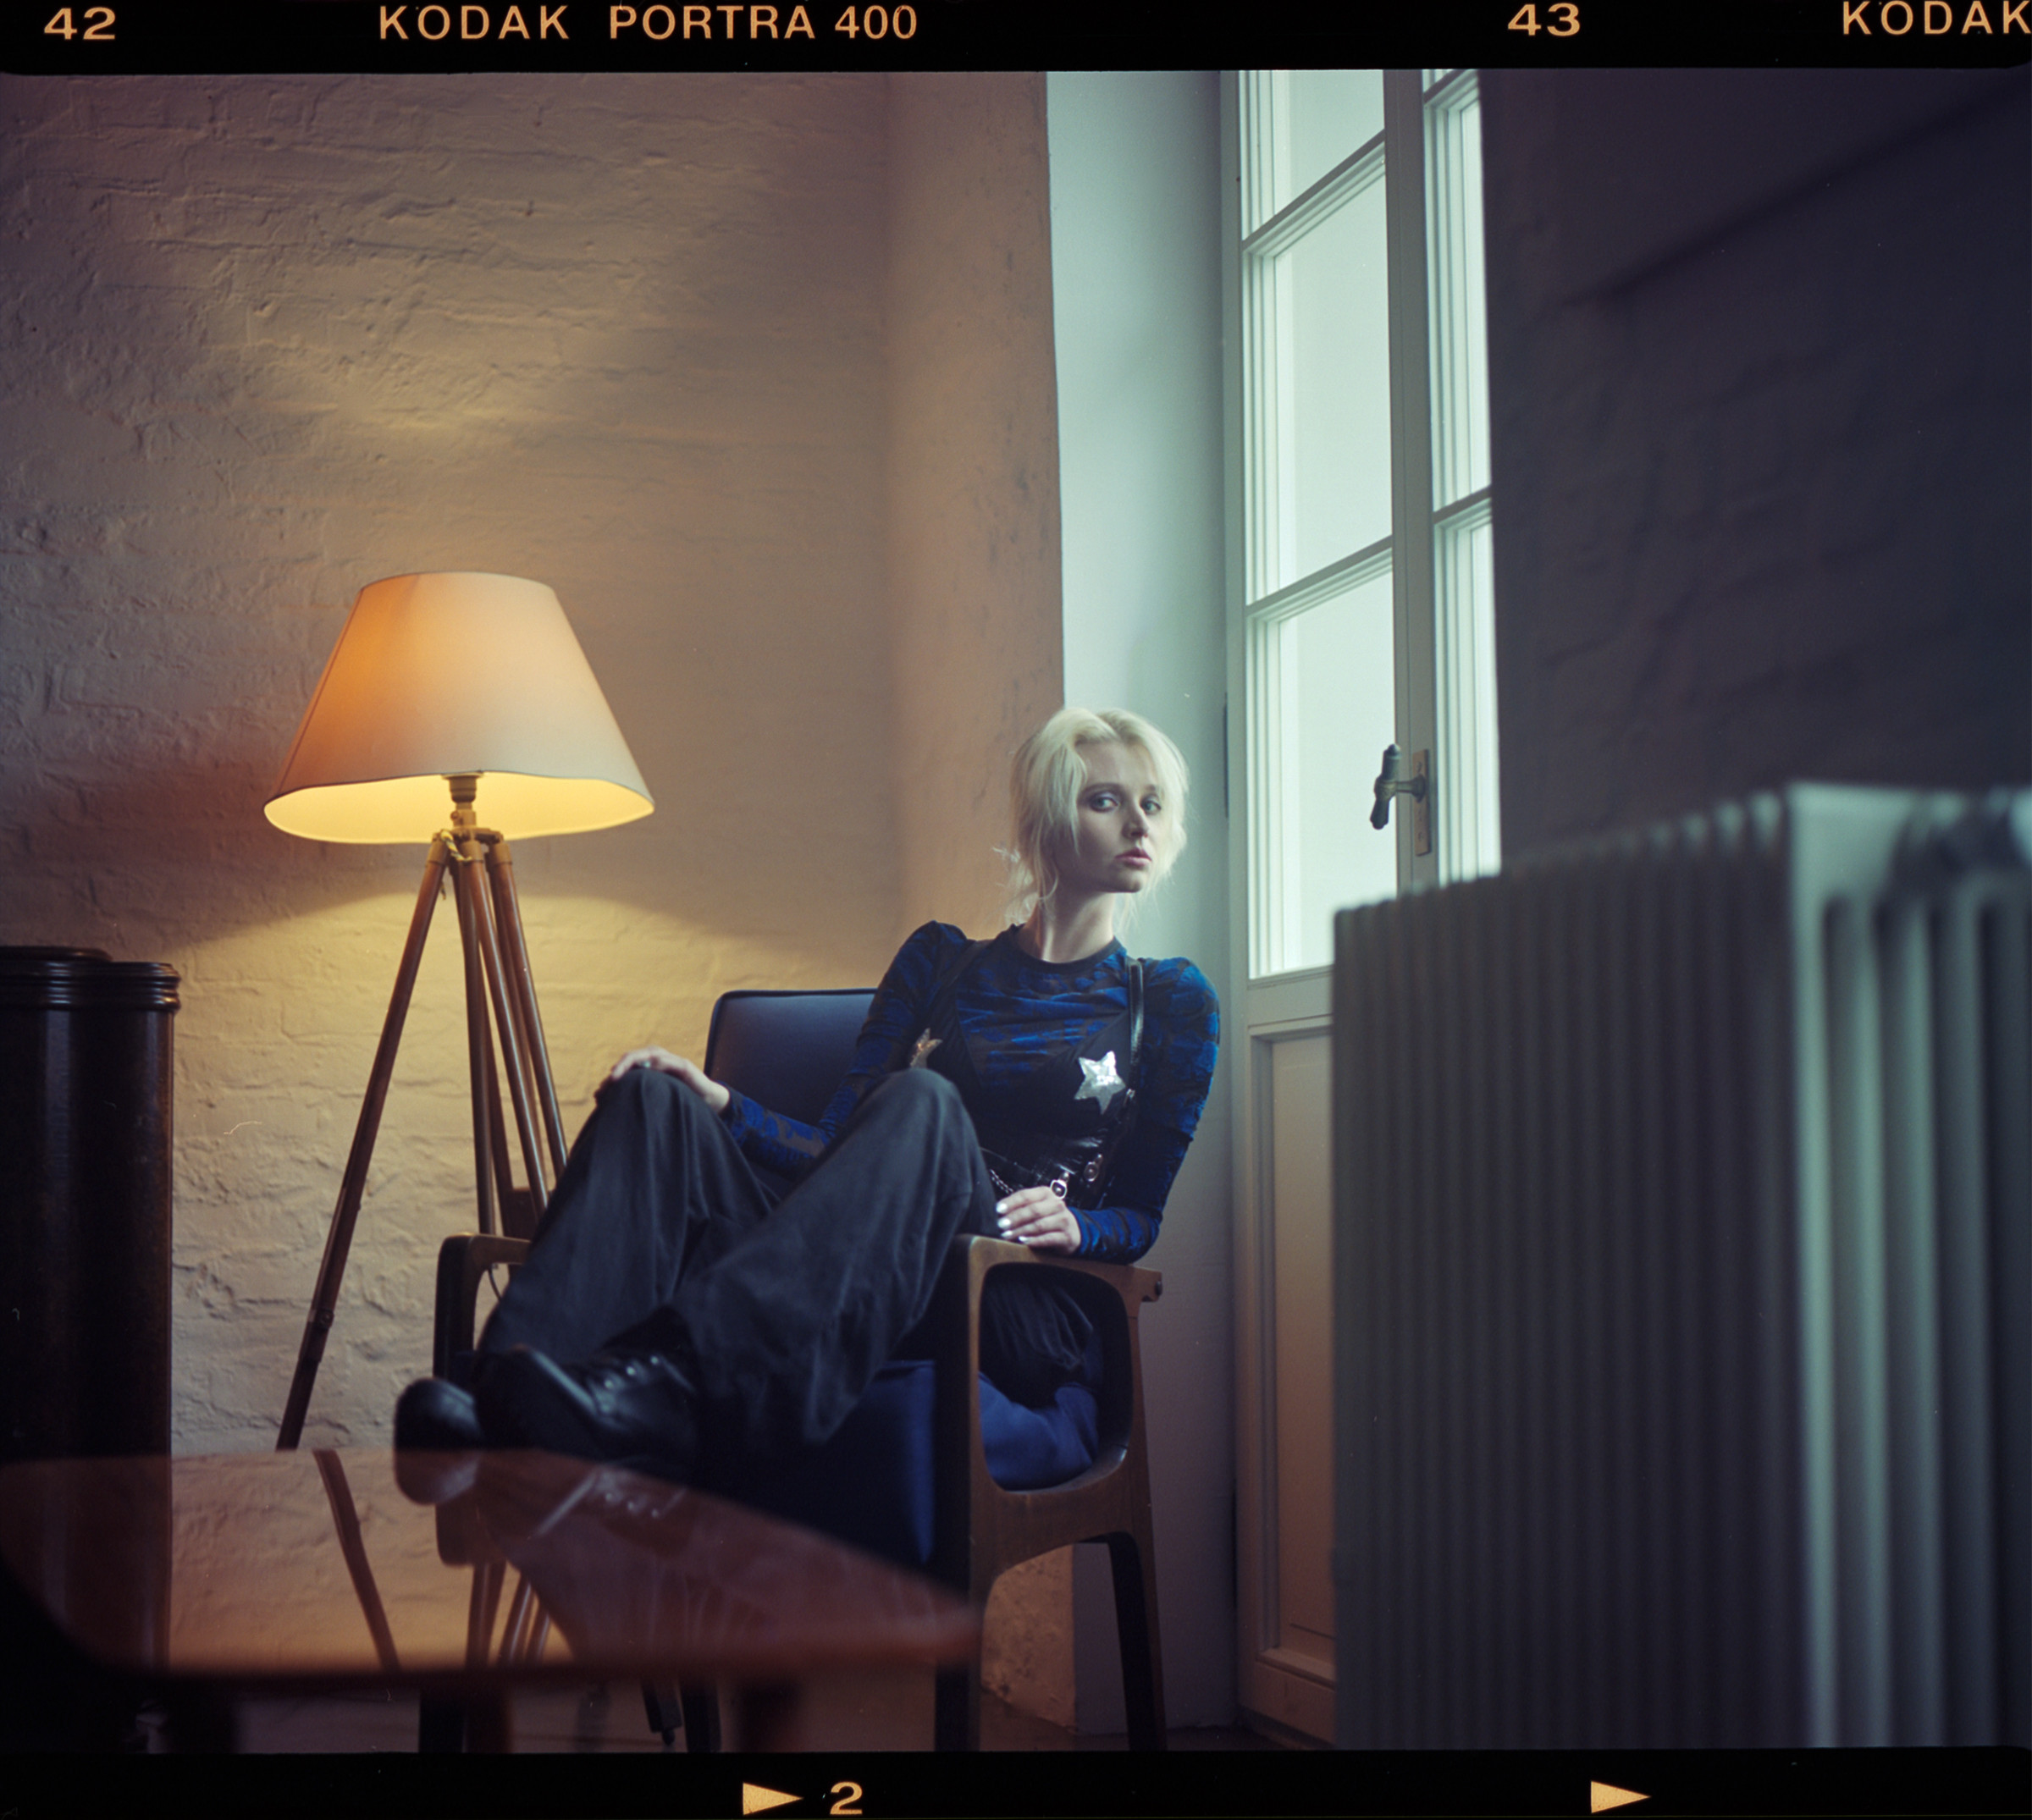
Example 6 – cinematic lighting
During a photo session shot on location at Foto Foka, I worked with model Ola Dębska, creating analog material on Kodak Portra 400 film. My goal was to achieve a cinematic look—not only through the choice of equipment and styling, but above all through the lighting, which was meant to give the images atmosphere and authenticity.

Photo: Piotr Werner, Model: Ola Dębska
I decided to use practical light—a floor lamp that actually appeared in the frame. It set the overall mood of the scene. To complement this, I added artificial light behind the model in the form of a GlareOne LED 300 Bi-Color D, whose role was to subtly emphasize the model without breaking the realism of the scene. The artificial light filled the space, softened the shadows, and complemented the light coming from the floor lamp.
Maintaining color temperature consistency was crucial, which is why I used the LED’s color temperature adjustment to perfectly match the bulb’s light. The result was a slightly nostalgic, soft atmosphere with subtle film grain—an effect that would have been difficult to achieve using flash alone.
This combination of practical and artificial light allowed me not only to preserve the character of the location, but also to strengthen the visual narrative. The lighting enabled subtle light shaping—without dominating the frame—while highlighting the most important elements and allowing me to shoot analog.
Conclusion – conscious light choice as a storytelling tool
My journey as a photographer began with a fear of daylight and blind trust in flash. Over time, however, I learned that every light source has its own language, its own strengths, and its own limitations. The key is not choosing between LED and flash, but understanding what each type of light can contribute to the story I want to tell the viewer.
Today, I’m no longer afraid to experiment. I consciously use flash when I need full control over the image, but I’m equally happy to reach for LED lights when I’m after naturalness, narrative depth, and a soft, observable light effect.
In my everyday work, it’s the flexibility and reliability of the GlareOne system that give me creative freedom—whether I’m working in the studio, on location, or in tight client spaces. Thanks to a wide range of modifiers, control options, and build quality, I can focus on what matters most: creating images that carry emotion.
If I were to leave you with one thought after reading this article, it would be this:
Light is not a technique—it’s a language.
It’s up to you how fluently you learn to speak it.
Piotr Werner

Piotr Werner has been a photographer since 2010, when the camera became an inseparable part of his everyday life. He specializes in fashion and portrait photography, while being equally passionate about creating campaigns and working with people, light, and emotion. For Piotr, photography is more than a profession—it is a way of seeing the world. He values images with character, images that tell stories and play with light like music.
On a daily basis, he proudly serves as an ambassador for brands he truly respects: Leica Camera Poland, GlareOne, Voigtländer, Calibrite, Sekonic, and Newell. He conducts photography workshops, teaches retouching, and regularly meets with fellow photographers over coffee, sharing knowledge—something that brings him great joy.
He is the author of the books In the Light of Inspiration and Mastery of Color in Photography. His work has been exhibited at events such as Milan Fashion Week and published in magazines including British Vogue, Digital Photographer Poland, and other renowned titles. In 2024, he was awarded Photographer of the Year in the Fashion – Beauty category at the Refocus Awards. His greatest joy, however, comes from the simple fact that he still loves taking photographs.
Read more articles
 https://glareone.eu/wp-content/uploads/2025/12/030_KA519858_Olga_Social.jpg
1366
2048
Kamila Przyjemska
http://glareone.eu/wp-content/uploads/2024/04/logo-glareone.png
Kamila Przyjemska2025-12-22 10:52:262025-12-22 13:40:35GlareOne Flash Lights in a Sports Photo Shoot – Have the Botis 400 and Botis 600 Changed the Game?
https://glareone.eu/wp-content/uploads/2025/12/030_KA519858_Olga_Social.jpg
1366
2048
Kamila Przyjemska
http://glareone.eu/wp-content/uploads/2024/04/logo-glareone.png
Kamila Przyjemska2025-12-22 10:52:262025-12-22 13:40:35GlareOne Flash Lights in a Sports Photo Shoot – Have the Botis 400 and Botis 600 Changed the Game?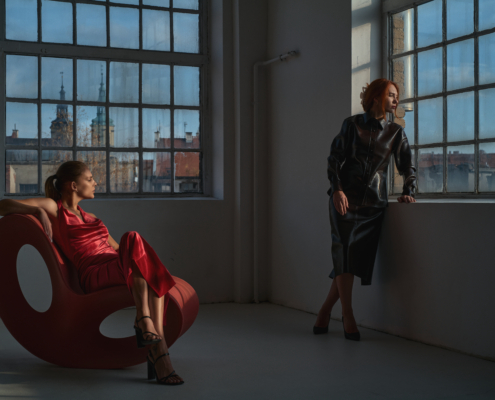 https://glareone.eu/wp-content/uploads/2025/12/Glare-One-12-1-scaled.jpg
1708
2560
Kamila Przyjemska
http://glareone.eu/wp-content/uploads/2024/04/logo-glareone.png
Kamila Przyjemska2025-12-19 13:52:462025-12-19 14:39:25Conscious lighting in photography – combining flash power with LED subtlety
https://glareone.eu/wp-content/uploads/2025/12/Glare-One-12-1-scaled.jpg
1708
2560
Kamila Przyjemska
http://glareone.eu/wp-content/uploads/2024/04/logo-glareone.png
Kamila Przyjemska2025-12-19 13:52:462025-12-19 14:39:25Conscious lighting in photography – combining flash power with LED subtlety https://glareone.eu/wp-content/uploads/2025/12/dz0zMDAwJmg9MjIwNA_src_240555-Clipboard2-scaled.jpg
1881
2560
Kamila Przyjemska
http://glareone.eu/wp-content/uploads/2024/04/logo-glareone.png
Kamila Przyjemska2025-12-17 12:04:232025-12-17 13:22:48New player in the flash market – GlareOne Botis 80 and Botis 200
https://glareone.eu/wp-content/uploads/2025/12/dz0zMDAwJmg9MjIwNA_src_240555-Clipboard2-scaled.jpg
1881
2560
Kamila Przyjemska
http://glareone.eu/wp-content/uploads/2024/04/logo-glareone.png
Kamila Przyjemska2025-12-17 12:04:232025-12-17 13:22:48New player in the flash market – GlareOne Botis 80 and Botis 200