")
Portrait photography is incredibly fascinating – we work with another person, show emotions, and create light and shadow that will look different on every face. In this article, I’d like to share my approach to this type of photography, present a solid dose of theoretical details, and also lift the veil on how such a session can look behind the scenes, all in the light of the new GlareOne lamps.
I’ve been interested in portrait photography for a long time. I’ve had my ups and downs, starting with studio lights, only to completely reject them after a short time and begin taking all photos in natural light. With this baggage of experiences, I eventually came to the conclusion that there’s no one best type of light. Natural, flash, continuous – each of them has its pros and cons. It’s like saying tea is superior to coffee, or vice versa… I can’t start my day without either. Similarly, with photography – you need to be able to adapt to any situation because we often find ourselves working in very different conditions.
How to prepare for a portrait session?
When doing portraits, it’s worth preparing for them. Of course, sometimes a walk with a camera and a model around the city can bring a lot of joy and good photos, but when thinking about studio-like conditions, you need to have a concept. I wanted to take many different photos – with various styles, backgrounds, and lighting setups. I didn’t want to have 5 interesting but similar photos. I started by coming up with simple concepts, which I’ll describe below, but I opted for classics and a bit more play with light and color.

When doing portrait sessions, it’s worth considering collaborating with a makeup artist, especially if we’re planning closer portraits. Makeup for our photos was done by Daniel Nowak, and according to my request, he prepared a fairly light and universal makeup – it was supposed to work well both in classic and colorful settings, so there’s no strong, dominant color. Many beginner photographers don’t pay too much attention to this. Similarly, beginner makeup artists, which can result in, for example, neon-colored makeup against a backdrop of hay bales – I probably don’t need to convince anyone that it just doesn’t go together. Of course, the model can also do her own makeup, but she has to be good at it, and you photographers should pay attention to whether the face has a completely different color than the neck and whether there are any other mistakes. After setting up the light, it’s worth looking at the photo together and assessing whether the makeup needs any adjustments.
Equally important in portrait sessions are the clothes. I’m lucky that Amelia is a stylist, so after a quick look into the wardrobe, everything was clear. We opted for clothes from popular retail chains, yet they look interesting in the photos. Personally, every six months, at the end of sales, I like to go to Zara or Massimo Dutti and add interesting patterns to my wardrobe. Often, dresses are discounted from 200 to 30 PLN, and they can really spice up our sessions. Contrary to appearances, when arranging a session with a model, it may turn out after the meeting that there’s nothing interesting in her bag, or it simply doesn’t fit our idea.
You also can’t forget about the atmosphere during the session. I’m lucky that Amelia is my partner, so we get along really well, but regardless of who I’m photographing, you have to establish a rapport. It’s worth having a coffee together, browsing through inspirations, talking about the weather, trips, and avoiding controversial topics – political or philosophical. You also can’t forget about music – it perfectly fills the moments when you’re silent, besides, it sets a good rhythm for the whole session. I don’t part with my portable speaker, and when shooting in the studio, music is playing constantly. Let the person you’re photographing choose the playlist – they should be the most relaxed.
Choosing light for a home portrait session
At the beginning of the article, I mentioned that there’s no one best light. I work with every type, from small LED panels and reporter lights, through classic studio lamps, to large Arrimaxes – it all depends on the situation. The photos I took for this article were taken using GlareOne lamps. These are LED lamps generating high-quality continuous light. I had 3 types at my disposal – a 12-watt, small panel with variable color temperature of the generated light, a larger 60W LED 600D lamp with both battery and mains power supply, and a LED1500 model, a really decent lamp with a power of 150W.

Continuous light has a number of advantages, but of course, there are no roses without thorns. Let’s start with the bright side. Its biggest advantage is, first of all, the fact that we photograph exactly what we see. Using live preview on our camera, after pressing the shutter button, the captured image is almost 1:1 with what we saw just before taking the photo. This makes controlling the light the simplest, most accurate, and most enjoyable. We can perfectly see the relationship between the power of individual lamps on the set, the distribution of shadows, or the direction of the light. Of course, in studio flash lamps, we have modeling light, but the characteristic of flash and continuous light (in this case modeling) is still somewhat different, which can make it a bit troublesome for inexperienced hands. Another advantage of continuous light is the ability to use it for both photos and video recording. Nowadays, more and more people combine these two fields, so often in photo-film magazines, we find both continuous light and flash.
Another big advantage is also the ease of mixing continuous light with natural light. Then we simply illuminate the photographed person as we want and that’s it. Flash will, of course, also work here, but again – it won’t be as simple as with light that we just see. Continuous light is also perfect for photographers who love a shallow depth of field. With continuous light, we’re not interested in any synchronization times, HSS, and the like. Want to use f/1.2? Go ahead! At most, you’ll shorten the time to 1/800 of a second.

As I mentioned, there are no roses without thorns. Continuous light, compared to flash, will be significantly weaker, so when wanting to illuminate large photo sets, powerful lamps are used. For example, when working recently on a large photo set outdoors, we used an Arrimax 18/12 lamp with a power of 18,000 watts! A 60 or 150-watt LED lamp is perfectly sufficient for portrait photography, as long as we don’t want to work at apertures of f/8 or f/11. During our photoshoots, I used a significantly wider aperture – after all, it’s a portrait. Another inconvenience may be the fact that when wanting to work in studio conditions, we should get rid of other light sources, and it’s best to simply work in a darkened room. But let’s get into specifics.
Utilizing neon lights in a portrait session
I planned the entire session in our miniature studio, which nevertheless is perfectly adequate for photographing people in an American shot. The room is quite narrow, but it offers a decent distance from the background. I intentionally chose this place because, in reality, you’ll be able to take similar photos in your own apartment.


When I was moving my work to a new location, I decided that in the background, I wanted to hang a few neon lights. Simple fluorescent tubes, colored filters, and fixtures were enough to prepare a small neon wall. However, when photographing only in their light, the problem was a strong shadow on the other side of the face, and when photographing with the neons in the background, the face was completely dark. Here, a small LED panel came to the rescue – I chose a 12-watt one with side lighting. Compared to panels with front lighting, this one provides less light, but there’s no “multi-shadow” issue. The panel can be powered from both the mains (using a dedicated power supply) and NP-F batteries – I chose the latter option. In this setup, we used a metallic dress and glasses that complemented the neons well. We took several photos with different settings and angles relative to the neons, while the LED panel worked at full power and a temperature of 6000K. In this situation, I only missed a little scene illumination, so this little one really did the job.
Imitating daylight – how to build natural lighting using lamps?
I love photos lit by very soft, natural light. I often take such photos by a balcony window, through which a lot of light comes in on sunny days. However, this day was very dark and rainy, so to achieve the right brightness in the photo, I would have to work with shutter speeds around 1/10 of a second or ISO 1600 – neither was an option. So, I decided to simulate soft daylight and supplement the remaining sunlight with light from a LED1500 lamp, which I placed on the balcony and directed through a classic reflector at the balcony windows.


Light and shadow in classic studio portrait photography
In the next set of photos, I wanted to play more with light and shadow. For this series, I used several settings with different lamps, which I’ll describe below. The linen background was replaced by a hand-painted gray backdrop with a delicate concrete texture from Kuyavia Backdrops. I really like these types of backgrounds for their uniqueness and, again, their natural character. The rusty dress was replaced by a trendy, ashy suit, under which Amelia wasn’t wearing a bra, adding a bit of edge to the photos.
I started with the classic – top-side light without any additions. I attached a 70-centimeter, hexagonal, deep softbox with two diffusing planes to the LED1500 lamp. These types of modifiers provide very soft but directional light, and when placed close to the subject, they create a nice vignette on the background. Even though the model was quite close to the background, it remained quite dark. Working at half power, I achieved settings of 1/320s, f/1.4, ISO 200.


While shooting closer portraits, I felt the need for a subtle catchlight in the eye, and the shadow on the face was a bit too strong. Therefore, I decided to make a subtle adjustment – I placed the same 12-watt LED panel under Amelia’s face, which completed the overall lighting. The eyes came to life, and the shadows became softer.

Sticking with the same background and styling, I decided to create a completely different atmosphere for the photos. All we had to do was move our main light close to the background and use it as a rim light, but without any fill light in front. The light interestingly emphasized the silhouette and added mood to the photos. Additionally, we achieved a vignette effect in the background, all thanks to the change in the position of our lamp.

The next evolution of our setup involved adding another light – this time as a rim light to outline the silhouette. Here, I used another LED1500 lamp (also at half power) with a strip softbox (30×120 cm). The strip light casts a narrow beam, takes up little space, and softly outlines the silhouette. The main light, without changing parameters, moved a bit farther than in the first photos, making the light more general, the background brighter, and the shadows slightly harder. Additionally, I used a 100-watt fan to blow the model’s hair, which, combined with wider shots and the geometric suit, added a lot of dynamism.

The last photos in this background and styling were meant to look completely different. Soft light modifiers gave way to a snoot, which provides very hard, focused, almost stage-like lighting. I wanted to achieve an almost black vignette, strong shadows, and focus all attention on the model. The snoot was attached to the LED600D lamp this time, and the parameters changed to 1/80s, f/1.6, ISO200.

Pastel, mint – how to take portraits on a colored background?

Summarize
As you can see, even in a small space, with a model, a few sets of clothes, and backgrounds, you can create a series of interesting photos. The continuous light from GlareOne that I used during the session worked great. Working with it at wide apertures provides sufficient light, playing with light and shadow is incredibly easy, and thanks to its high CRI index, there are no issues with colors. If we add the battery power option in the LED600D and its very moderate price, we get a product that performs really well in this type of photography.
You can find more information about GlareOne lights on the GlareOneTV YouTube channel.
Jakub Kaźmierczyk – profile

My name is Kuba Kaźmierczyk and I have been professionally engaged in photography for over 10 years. It’s something that accompanies me every day during my sessions, but also in my free time. I strive to be a versatile photographer, which is why my portfolio includes photos from various fields of photography. Commercially, I mainly work with companies creating photos for advertising campaigns. I have worked for companies such as Renault, Dacia, Lexus, Grycan, Pizza Hut, KFC, Burger King, Eurobank, Shopee, Acer, Olympus, and many others. I photograph interiors, products, people, and culinary subjects. After hours, I indulge in portrait and fashion photography – it gives me the most pleasure and satisfaction, especially when creating thoughtful sessions with interesting stylizations. I increasingly reach for analog cameras, which make me feel like I’m returning to the roots. I like to challenge myself and try new things – underwater and drone photography, for example. During my numerous trips, I observe the bustling life of the city, photograph landscapes, food, and the local community.
My second area of activity is photographic education, both live and online. I actively manage social media, record videos for my YouTube channel, and engage in preparing training materials for the eduweb.pl platform. Recently, I’ve been developing the photographic path of the ahoy.so platform, a community of photographers, where I create numerous photographic guides. I also conduct live streams, during which I do sessions, edit photos, and provide business advice.
I also collaborate with many companies in the photography industry, leaders in their fields. Mutual support and appreciation of my work are extremely important to me, and thanks to it, I can prepare materials from photo sessions and demonstrate the practical use of equipment. I collaborate, of course, with Peak Design, as well as brands such as GlareOne, Canon, OM-System, Eizo, Wacom, Manfrotto, Acer, Nvidia, WD, Sandisk.
Read more articles
 https://glareone.eu/wp-content/uploads/2025/12/030_KA519858_Olga_Social.jpg
1366
2048
Kamila Przyjemska
http://glareone.eu/wp-content/uploads/2024/04/logo-glareone.png
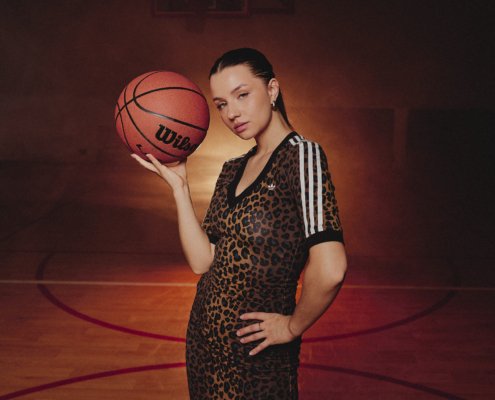
Kamila Przyjemska2025-12-22 10:52:262025-12-22 13:40:35GlareOne Flash Lights in a Sports Photo Shoot – Have the Botis 400 and Botis 600 Changed the Game?
https://glareone.eu/wp-content/uploads/2025/12/030_KA519858_Olga_Social.jpg
1366
2048
Kamila Przyjemska
http://glareone.eu/wp-content/uploads/2024/04/logo-glareone.png
Kamila Przyjemska2025-12-22 10:52:262025-12-22 13:40:35GlareOne Flash Lights in a Sports Photo Shoot – Have the Botis 400 and Botis 600 Changed the Game? https://glareone.eu/wp-content/uploads/2025/12/Glare-One-12-1-scaled.jpg
1708
2560
Kamila Przyjemska
http://glareone.eu/wp-content/uploads/2024/04/logo-glareone.png
Kamila Przyjemska2025-12-19 13:52:462025-12-19 14:39:25Conscious lighting in photography – combining flash power with LED subtlety
https://glareone.eu/wp-content/uploads/2025/12/Glare-One-12-1-scaled.jpg
1708
2560
Kamila Przyjemska
http://glareone.eu/wp-content/uploads/2024/04/logo-glareone.png
Kamila Przyjemska2025-12-19 13:52:462025-12-19 14:39:25Conscious lighting in photography – combining flash power with LED subtlety https://glareone.eu/wp-content/uploads/2025/12/dz0zMDAwJmg9MjIwNA_src_240555-Clipboard2-scaled.jpg
1881
2560
Kamila Przyjemska
http://glareone.eu/wp-content/uploads/2024/04/logo-glareone.png
Kamila Przyjemska2025-12-17 12:04:232025-12-17 13:22:48New player in the flash market – GlareOne Botis 80 and Botis 200
https://glareone.eu/wp-content/uploads/2025/12/dz0zMDAwJmg9MjIwNA_src_240555-Clipboard2-scaled.jpg
1881
2560
Kamila Przyjemska
http://glareone.eu/wp-content/uploads/2024/04/logo-glareone.png
Kamila Przyjemska2025-12-17 12:04:232025-12-17 13:22:48New player in the flash market – GlareOne Botis 80 and Botis 200